Tuesday 29 September 2015

Something Wonderful in Year 12

Hi there! I'm back with you to share my second layout using the Something Wonderful kit from Scrappy Chat Designs. The papers and the colours in this are gorgeous. I also love the yummy Shimmerz and there's a great versatile background stamp plus other goodies.


I've used some interesting punching techniques to create see-through layers on this one.


Head over to the Scrappy Chat Designs blog here to see the full layout.

All Scrappy Chat Designs members will receive a Tech Sheet showing how I made this. Are you a Scrappy Chat member yet? If not, here are the details:
Joining Scrappy Chat Designs is like doing 3 classes each month - all in the comfort of your own home!

Each premier kit comes with:
Video AND instructions to complete the three layouts and feature many techniques with product to be used well after the life of the kit. (With all of our kits you will have plenty of product and knowledge to add to future projects)
Photos of each project including close up detail pictures.
All the product needed to complete the project with a list of additional basic items used such as ink/ paints/gesso/texture paste and colour sprays you will need out of your supplies.
The kits focus on how to use various products teamed up with some pretty paper to compliment them, so there is always less or non-consumable products in our kits, to not only help you complete some beautiful projects, learn many techniques and ways of using the different product as well as taking them well beyond the kit projects.
Kits are $39 + postage and come out monthly. Please e-mail us at orders.scrappychatdesigns@gmail.com if you would like to order this kit

For more kits and other products visit our website www.scrappychatdesigns.com.au

Scrappy Chat Designs Kit club Membership (e-mail us to purchase):
This lasts for 3 months is $135 and includes 3 kits at 5% off and postage for all 3 kits (they are released monthly). As a member you also get ‘insider’ info on what is coming up in the next kit – sometimes even a pic! You get additional 'Technique sheets' showing you more techniques you can nail with the product in the kit from the talented Arty Chic's. You are also guaranteed the kits which do sometimes sell out VERY quickly. If you are interested in membership, you need to pay the membership fee by the 30th of the month prior.

Just email for this deal orders.scrappychatdesigns@gmail.com 


Happy scrappin'!


Heather

Friday 25 September 2015

Working With Memorabilia

Hello again!

I thought I'd share a couple of layouts I made for Scrapbooking Memories magazine recently. I wrote an article about how to incorporate memorabilia into your layouts.

My first layout is made entirely from memorabilia from the escape2create retreat I attended earlier in the year.


I used name tags, products leftover from classes and items from goodie bags. I even used words from a serviette as my title. The only thing that isn't memorabilia is the white cardstock!

In the article I discussed how pockets can be used in a variety of ways to hold memorabilia. This layout shows a few of those ways. There are three pockets on this page - can you find them all?


The article was in Volume 18, No 4.


Happy scrappin'!

Heather

Sunday 20 September 2015

Dusty in September

Hello scrappy friends! I'm back with you today to share the layout I made using the gorgeous September mood board from The Dusty Attic as my inspiration. You can find this month's challenge here.

Don't forget, the winner of this month's challenge receives a $100 Dusty voucher! Woohoo! Are you going to give it a go? Also, any online orders above $75 receive free shipping. You can't ask for more than that!

Here's what I made this month:


I took my inspiration from the gorgeous pastel pinks and blues in the mood board. I took this photo on Santorini. I'm not a motor bike person but seriously, this is sooo adorable!

I painted all my chippies with Navajo White Dusty in Colour paint to start with. I then used Dusty Pink paint to highlight some sections. The flourish behind the bike looks like a cartoon puff of smoke from the exhaust pipe!


 I used a length of ribbon to hang the Journey Word Tag inside the Decorative Frame #1.


I thought I'd share a trick showing how I used up some of my chippie scraps to make new chippies. 

Step 1


Push out the circles from the centres of the two pieces in the Decorative frame #1 pack. Paint them white then stamp them with watermark versamark ink.

Step 2


Add Tinby Designs Metallic Melts and heat to set. You now have a completely new chippie to add to your project! How simple is that?

Here's what mine came out like:


And this one:


These are the Dusty Attic products I used:

Decorative Frame #1 DA0207

Foliage DA0506

Word Tags #1 DA1075

Teeny Tiny ABC Set DA0983

Dusty in Colour Paints in Navajo White and Dusty Pink

and - once again......
Dusty in Colour Clear Gloss Varnish DA0901

I also used a triangle chippie and stencil that were made for the e2c retreat.


Happy scrappin'!


Heather McMahon


Thursday 17 September 2015

Wonderful!

Hello and welcome back! I'm here with you today to share a layout I made using the new "Something Wonderful" kit from Scrappy Chat Designs.. We got to play with the gorgeous Shimmerz Creameez in this one. It was lots of fun! There are also awesome papers, a stamp and bits and pieces for making amazing pages.

Here's a sneaky peek of what I made:


Head over to the Scrappy Chat Designs blog here to see the full layout and to pick up a few tips on using some of the products!

I hope you have an amazing time with this kit. If you don't currently receive the kits, here's the info you need to know: Joining Scrappy Chat Designs is like doing 3 classes each month - all in the comfort of your own home!

Each premier kit comes with:
 - Video AND instructions to complete the three layouts and feature many techniques with product to be used well after the life of the kit. (With all of our kits you will have plenty of product and knowledge to add to future projects)
 - Photos of each project including close up detail pictures.
 - All the product needed to complete the project with a list of additional basic items used such as ink/ paints/gesso/texture paste and colour sprays you will need out of your supplies.

The kits focus on how to use various products teamed up with some pretty paper to compliment them, so there is always less or non-consumable products in our kits, to not only help you complete some beautiful projects, learn many techniques and ways of using the different product as well as taking them well beyond the kit projects.

Kits are $39 + postage and come out monthly. Please e-mail us at orders.scrappychatdesigns@gmail.com if you would like to order this kit

For more kits and other products visit our website www.scrappychatdesigns.com.au
Scrappy Chat Designs Kit club Membership (e-mail us to purchase):

This lasts for 3 months is $135 and includes 3 kits at 5% off and postage for all 3 kits (they are released monthly). As a member you also get ‘insider’ info on what is coming up in the next kit – sometimes even a pic! You get additional 'Technique sheets' showing you more techniques you can nail with the product in the kit from the talented Arty Chic's. You are also guaranteed the kits which do sometimes sell out VERY quickly. If you are interested in membership, you need to pay the membership fee by the 30th of the month prior.

Just email for this deal orders.scrappychatdesigns@gmail.com 


Happy scrappin'!


Heather

Saturday 12 September 2015

Behind Every Good Layout Is A Great Glue!

Hello and welcome back!

Today I want to talk about something that isn't dreadfully exciting but is actually really important to all our work. It's glue. Yep, glue. But this is no ordinary glue - it's Dusty Attic's Clear Gloss Varnish!

Firstly, I'll show you my layout then I can explain why Clear Gloss Varnish is sooo amazing!


Now here's the first interesting thing about Clear Gloss Varnish. Although it's a varnish, it's actually far more useful as a glue. I always use it to glue my chippies. It's fantastic for any item that needs a good strong glue to hold it in place. On this layout I've used it on every chippie, which actually is everything on my page. The only thing I don't use it for is to attach the photo. It depends on what quality your photo paper is but it can sometimes faintly show through. I stick to double-sided tape for the photos.


As you can see here, I've layered chippies on top of chippies on top of chippies. Some of those red flowers are only attached by a very small part of a petal or two, yet Clear Gloss Varnish is still strong enough to hold them.


I used Magicals, a couple of stamps and a bit of stencilling on the background but everything else on the layout is Dusty Attic chippies.

Now the second amazing thing about Clear Gloss Varnish is that it makes a fabulous glossy varnish - no surprises there! I use it on top of my chippies to add a gorgeous glossy finish. A hint: do this when your layout is otherwise finished. Apply the varnish direct from the bottle onto your chippies or other suitable embellishments. Then put it aside to dry overnight. Keep it out of the way of kids, animals or your own elbows while it dries!

Here are what my flowers looked like before I applied the varnish:


Here they are after the varnish, while the varnish was still wet.


And here they are the next day when the varnish has dried. Unfortunately, this isn't really showing the gloss as I took this photo on an overcast day.


And the third amazing reason for always using Clear Gloss Varnish? It doesn't dry up in the nozzle! Other similar products seem to be prone to doing this, meaning we forever have to unblock them with a pin, but not this one! Of course, if you leave it with the lid off for a period of time, any glue will dry out and block the nozzle.

So there you have it - Heather's hot tip for an easy, reliable, fuss-free glue - and varnish!

Here are the Dusty Attic products I used:

Branch #3 DA1094

Spring Blooms #2 DA1285

Elegant Swirls #9 DA1129

Hashtag Saying DA1076

Flutterbies #3 DA0766

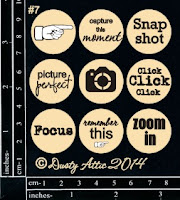
Page Pebbles #7 DA1112

and of course......
Dusty in Colour Clear Gloss Varnish DA0901


Happy scrappin'!


Heather McMahon

Monday 7 September 2015

Limor Webber at Paperific

Hello there! Today I just want to share some pics of the class I did with Limor Webber at the Paperific Expo. Heaps of scrappers from Victoria, as well as some from as far away as Tassie and Western Australia, attended the show and took Limor's class.

I think it's fair to say we all had a ball! The class was completely painting-based and most of us are scrappers, so there were a few challenges! We learned some cool techniques and I love how different our canvases finished up.

Here's what I made:


I really love how it turned out. My only disappointment is that the white text has faded. I'll have to go over it with white paint or something.

Here's Limor:


And here are the three stooges with Limor (Beck Beattie, Fiona Paltridge and I). Fiona is the only Aussie on Limor's DT which is a real credit to her.


I'll have to try to track down the whole class pics. The different colours in our work was stunning!

I also had a display at the expo. Sorry for the terrible photo. My phone camera takes terrible pics under bad light.


Anyway, it was a great day!


Happy scrappin'!

Heather

Tuesday 1 September 2015

Make Your Own Magic

Hello and welcome back to my blog.

Today I have something rather unusual to share. This month I made a canvas for the September Scrap Around The World challenge. I decided to do something completely different with it.

Meet Zelda!


Here's the fantastic mood board by the amazingly talented Lydie Denis that I based my canvas on.


I love the colours on this so I used them on my project. I also incorporated book paper and twine. The words "live life" led me to the title of my canvas - "Make Your Own Magic". As you can see though, I certainly didn't use the vintage theme!

I've seen a few fabulous artworks around lately featuring African animals. I thought I'd give these a try. I wanted to use a zebra as it has such striking features. I was rather pleased with myself for being able to paint this I must say!

Somewhere along the way, the zebra acquired a name - Zelda.  I wanted to do something different with her though so, to show how anyone can make their own magic, I glammed Zelda up with pink and silver accessories. She's such a fashionista - lol!


I used Tinby Designs Metallic Melts on Dusty Attic chipboard for the title and the stars. I also traced around some Dusty Attic chippies with a black pen for a bit of extra interest on the background. LSG Magicals are a feature on the background. I love how they make it look like there's a party happening on the canvas!


Zelda's punk hairdo is actually quite natural - I just added a bit of metallic silver and pink to it. Oh - and every girl needs a bit of bling in her ear!


Some cats-eye glasses and Zelda's look is complete!

I hope you can join us at Scrap Around The World this month. As usual, there are fabulous prizes!

Each month Scrap Around the World offers 10 MERIT BASED PRIZES, 1 random prize & 1 follower's prize so 12 PRIZES PER MONTH! All winners must be official Google Friend Connect Followers of the SATW blog {see the SATW's sidebar - top left - to sign up!}

One random winner is chosen from all the entries, but please remember that to be eligible for this, you MUST upload your entry to the SATW Facebook page HERE! The other random prize is for one lucky COMMENTER so no need to even enter a project for this prize! Just leave some comment encouragement on any of the SATW 7 monthly blog posts right HERE!

ALL PRIZES ALWAYS INCLUDE FREE INTERNATIONAL POSTAGE!!

1st PRIZE
$50 value Googie Bag of die-cut chipboard from Scrapiniec
{image below is for illustration purposes & may not reflect exactly what you will receive}


2ND PRIZE
Prize package valued at $35 from 7 Dots Studio
{exactly as shown below}

3rd PRIZE
$30 worth of chipboard from 2Crafty Chipboard
{image below is for illustration purposes & may not reflect exactly what you will receive}


4th PRIZE
$25 gift certificate from Creative Embellishments


5th PRIZE
$20 worth of products from 13@rts
{image below is for illustration purposes & may not reflect exactly what you will receive}


6th PRIZE
17.50 Euros worth of products from Danafix, France.


7th PRIZE
$15 gift certificate from Studio75


8th PRIZE
15 Euros worth of products from Scrap-Unlimited
{image below is for illustration purposes & may not reflect exactly what you will receive}


9th PRIZE
$15 gift voucher from Mixed Media Place


10th PRIZE
Over $15 worth of scrapbooking supplies
from Design Team member Pascale B {France}
{exactly as shown below}


RANDOM PRIZE
Scrapbook kit from Scraps of Elegance Kit Club
{The random winner usually receives SOE's previous month's kit valued at $36.95}


RANDOM FOLLOWERS PRIZE
$50 gift certificate from The Dusty Attic


The deadline for this challenge is Wednesday September 30th 2015. I hope you will join us at Scrap Around The World! You can find the challenge HERE.


Happy scrappin'!

Heather